Introduction To Maya Basics–
Vertices– Vertices are the smallest components of a polygon model. It is simply a point in a three dimensional space. By connecting multiple vertices with edges you can create a polygon.

Edges– An edge is any point on the surface of a 3D object model where two polygonal faces meet.

Faces– a 3D model is comprised by lots of faces. It is also the defining characteristic of a polygonal model.

Polygon– A Polygon is a shape which is formed by the basic components such as vertices, edge, and faces.

3DTCM4. Understand the benefit of good workflows and efficient techniques for creating 3D modelling.
Firstly, i created a bit more of a complex spaceship possibly fictional by using a variety of tools which enabled me to make my spaceship. What i have learnt about 3D modelling in Maya that there are so many tools which can enhance my project which can develop my spaceship even further. Tools that i have utilized were useful and one of the tools that i have utilized was the extrude tool. This specific tool allowed me to change the shape of the cube from which i first started from. From then, i developed even further with the cube by extruding the face and transforming the shape into a more complex cube. furthermore, i held the right click button on my mouse which gave me the options to extrude the faces of the cube, vertices, the edges etc… when i was holding the right click button this allowed me to focus on the specific aspect of the cube. Above all, for the task to create my spaceship, i specifically focused on the extrude tool which made me focus on each aspect of the spaceship.
The problems that i have faced in Maya was the extrude tool however, the more i extruded the shape, the more i developed on, the more i improved and i got more familiarized with the tool.
So far, i believe that my progress is doing good, as i have created my spaceship, however, to improve, i needed to add thrusts onto the spaceship, to make my spaceship to look more realistic.
UV AND UV MAPPING –
UV mapping is basically the 3D modelling process of projecting a 2D image to a 3D models surface specifically for texture mapping such as adding color to it. In addition the U V’s are basically the axes of the 2D texture given that x and y and z are already utilized to denote the axes of the 3D object in model space. The UV coordinates are also known as texture coordinates which are generated for each vertex in the mesh.

What i have learnt about UV mapping in Maya is that its the idea that we unwrap a 3D model and wrap it as a 2D model. This would later allow us to color in our spaceship in a much quicker way. When i started UV mapping, i first selected the faces of my spaceship by holding right click and using my mouse to go over the face option, which later would enable me to unfold the shape as a 2D object. Furthermore, as i selected the planar tool this allowed me to layout the faces that i have selected. Next, i used the unfold option to unfold my object into a much neater way.
25/09/2019
3DCTM2. Understand the basic function of different types of textures.
A color texture map is basically adding color onto your 3D model. You could create a color map by utilizing the color wheel which allows you to use a variety of different colors which would be suitable for your 3D model. There are many colors that are available such as complementary colors which shows different colors matched together. In addition, there is another set of colors called analogous colors which allows you to blend colors with other similar colors such as red, orange, dark orange, yellow, this would give the 3D model a nice color layout. Common texture sizes are the templates which show the size of the unwrapped 3D model, the bigger the template, the bigger the size of the file.
Furthermore, in the session i started learning more about what i was doing when i was texturing. I have learnt that texturing is an important process as there is a variety of ways to texture your 3D model by utilizing many different ways into applying it onto the 3D model. Photoshop- I have used Photoshop for my own benefit to texture my model, first, i made sure the unwrapping of my 3D model was put into a neat square by pressing the layout button, next, i did a snapshot of my unwrapped layout of the model and i set it to 1024 by 1024 which would make it suitable for the template showing my unwrapped model, i saved this file as a PNG. After this, i went over to Photoshop to use my unwrapped model and to lay it out onto the screen in Photoshop. My next big step was to now think about texturing and all that i have learned about texturing such as the color wheel which shows a wide variety of colors on which i could have taken the advantage of but i chose not to use these colors as i preferred to use more of a metallic color onto my spaceship, this was used to make it look more realistic by showing its true nature of color for a spaceship.
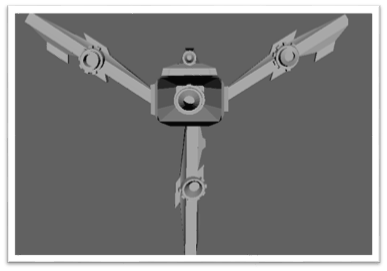
Finished Space Ship –

WHAT I DID AND WHAT I STRUGGLED ON–
For my Spaceship i used a singular texture to apply onto my spaceship which was a black metallic surface onto my spaceship. i kept the texture consistent throughout the design of the spaceship. i kept this spaceship simple by making a simple design given that i was just introduced to this new type of software known as Maya. My struggles in this design was the texture mostly, given that i messed up on the texture layout onto the UV shells. In addition, i hope to make a new spaceship which in that case will be much better and improved given that i will have learned new skills in my skill set.
6/11/19– MAKING A BETTER SPACESHIP–
Today, i created my new and improved spaceship as i believed i could have done so much better on my first attempt on making the spaceship. The first time i had ever created my spaceship was when i had little experience with the tools and the software itself as this was all new to me as i had never heard of this amazing software which had so much to offer. Eventually however, i managed to practice as hard as i could to utilize these techniques and apply them on my new and improved spaceship in which i had created today in a couple of hours, to help me develop i looked on to discover new ideas and how i could transform my new spaceship by applying these ideas to create a decent 3D SpaceShip model.
Firstly, what i wanted to do, was to make major changes to my spaceship, of course rebuilding the spaceship was important, however i wanted to add additional objects to the spaceship to make it look appealing, one of the major changes i did was add thrusters to my spaceship, previously, i did not add thrusters to my original spaceship and from that to improve i ensured that i would add those thrusters.

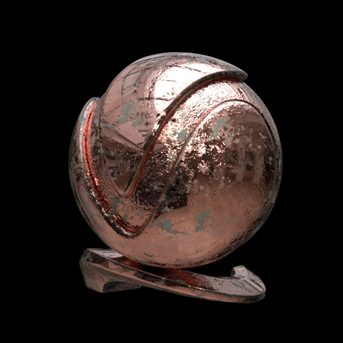
In addition, i also created my own minigun on my spaceship to give it an intimidating factor for my spaceship model, the minigun was placed at the bottom of the spaceship but i will show you the model detached from the ship first at the bottom as it shows my self created minigun asset.

Next, i will show you my whole 3D model design of the new spaceship that i have created below.


11/11/2019
3DCTM2. Understand the function of different types of textures.
PBR Materials/shaders– Physically based rendering is a method to the concept of using realistic shading/lighting models, in addition, it provides an accurate representation of how light interacts with surfaces.
Metalness maps– It is more of a mask between two different types of materials- conductive or dielectric.
Roughness maps– It controls how rough or smooth the a materials surface is.
Emissive Map- A texture that receives no lighting, so in this case the pixels are shown at full intensity.

Normal maps- Allows a surface to add bumps, grooves, and scratches

Quick Mask– It is an easier way to edit something you want to specifically edit.

The different map types that i used were metalness maps and roughness maps which were very easy to use and apply onto my mini character. In addition, to what i have learnt in this new software is that there are pre made assets which you can utilize and apply onto it. This is effective as it gives you a realistic feel of the character when applying these unique assets on. I’m still trying to get used to this software, but i will improve soon and get better at this. So far, you can see that i have used a metallic material on the face which is shown to be shiny and reflective, however i have applied a different type of metallic texture on. On the body, i have applied a aluminium texture, i have dragged the metallic color all the way to the left to 0 as for the roughness as well.

Home Projects– Pillow
12/11/19–
Today, i made my own pillow by using the maya software which i had utilized. What i did first was spawn a cube in the 3D viewport in the middle, next i enlarged the cube, expanding the width and height and the length to make a basic square shape.

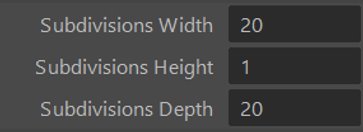
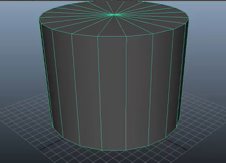
What i did next, was adjust the subdivisions of the shape.

To add to my finished product I applied a Lambert asset onto my pillow as a blue colour to give it an effective touch to my pillow rather than leaving it bland and as a white color.
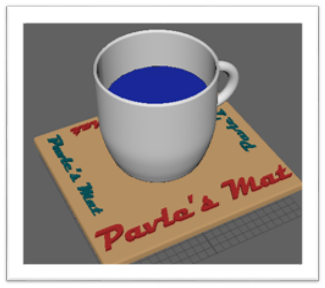
Another Small Project Made At Home– Basic Cup and Mat–
12/11/19–
Another one of my creations that i made today was my own cup which i made in Maya. This was a basic cup which i created, and it all started off with a cylinder spawned in the 3D viewport. Next, i edited the subdivisions height, axis and the caps to which i edited the axis to 30, the height to 8 and the caps to 0. For the caps, my aim was to get rid of all the lines that were on top of the cylinder rather than just deleting them one by one, in addition i did this to edit the face after by deleting it and by leaving a hole in the cylinder. This action was performed to make the cup as this was the whole idea of making the cup.
I then went on the front side of the cylinder and started editing the vertices of the shape by pressing r and moving the vertices forward by selecting a row of vertices and scaling them out row by row.
After this, i realised that the walls were very thin and that i had to adjust this by adding more thickness onto the walls. i did this by selecting the right clicking the object and going on object mode, then i went on to edit mesh and extrude,i changed the value of thickness to 0.35 to make the cup look how a normal cup should look by adding a little thickness onto the walls.

Furthermore, what i did was look to the side of the cup and i selected the faces of the cup and i deleted 2 faces in one row and 2 faces in another row, my aim was to delete these due to the idea that i was going to add a torus shape onto the empty squares to make a handle for my cup.
Of course for my next step, it was going to include spawning a torus shape which looked like a cut out circle in the middle, however my aim was to delete half of the torus by selecting all of the faces and pressing delete, but before i could do this i went onto the subdivisions of the shape and editing the subdivision axia and height, the value i changed for the axis was 30 and the height was changed to 6, these were recommended values for these subdivisions to make the ring look suitable enough to be made as a handle and then half of it to be cut out. I then rotated the half of the torus into a 90 degrees angle which would be the most suitable rotation angle for my handle to be attached to the cup.
I then attached the handle to my cup, i since i wanted the handle to stick onto the cup i went on the mesh toolbar and below i clicked combine to combine both objects, the cup and the handle, next i selected both objects and held right click onto the objects and selected vertices, one vertice was on the cup one was on the handle. What in did next, was selected both vertices and went on edit mesh and merge components together, i remained consistent with the same method that i was using as i eventually finished all of my vertices of. Lastly, the asset i selected for colours were lambert and the colours were white for the cup and brown for the cup mat
14/11/19
Today i decided to tweak and improve my Cup and Mat as you can see on the bottom there is a screenshot of my improved work. In addition, what you can see is that i have added water in the cup which was basically a sphere at first but with extrusion, i managed to scale it out and fit it perfectly into the cup as you can see there, furthermore what i decided was to get text onto my coaster stating that this was my coaster as written “Pavle’s Mat”.
18/11/19
3DTCM5. Understand smoothing/ subdivision and texture baking. 3DTCM6. Understand the concept of high to low polygon workflow.
A high poly model and low poly model are produced to create a 2D normal map through a process called “baking” to achieve the illusion of the high resolution detail on the low resolution model.
What i have learnt so far about high poly and low poly is that the way i had to achieve the high poly to transfer all of its details onto the low poly was to bake it in substance painter, but before all this, i made a cube in Maya, i named this cube_low, this was to indicate that this was the low poly cube. In addition, i duplicated this shape and renamed it cube_high, this was the model i was going to edit and then eventually transfer the details onto the low poly model by using the baking process.When finishing with the details, i took the low poly model and dragged it along the surface and editing the translations to 0 to match it with the high poly cube. After this, i exported selected both separately and saved them as obj files.

The quality of the work that i have created so far in my opinion is great given that this was my first time using this method and also using the method of baking, from the way i see it, my first attempt of using this method was successful and in the future, i think i could improve a bit more by adding more objects on the chest such as extensions.

My Cartoony Houses–

What i did was come up with the idea that i wanted to create something that was cartoony with various amount of houses mounted on top of each other to make it look unrealistic given that i was going for a more of a fun and vibrant cartoony edge to the scene.
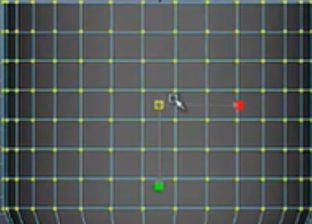
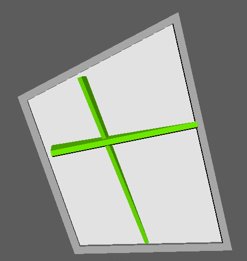
What i did to start with the houses were to spawn a cube onto the view port, form this i used the cube and used the tools such as extrusion onto the shape to make it a bit taller and make it look like a house, next what i did was use the vertices on top of the house to shape it in a house which you can see on the bottom which is an image of the shape of the house being formed due to the selection of the vertices selected. Furthermore, from here, to remain consistent i chose to copy and paste this house and stack the houses on top of each other to make it look ridiculous and cartoon like.

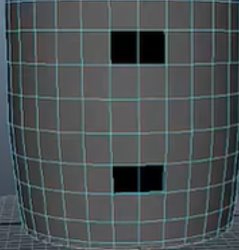
What i did next was make the exterior design of the house such as a door for which i created by using a cube by extruding it and making it a suitable height for the house, i utilized the vertices of the cube to make it look edgy and cartoon like, i also added a door knob which you can see at the bottom both the door and the door knob with the inside of the door textured. The door knob was basically a sphere but extruded a bit low to make it look realistic to be on the door.

From the shape of the door i again wanted to remain consistent in what i was creating which was the windows for the house in which i used the shape of the door frame to use as the windows which you can see at the bottom, in addition, i spawned another cube for then which i duplicated to make the common cross as the exterior of the window but in a wonky way to show its unrealism cartoon concept. Above all, the cross known as a muntin was textured in varied colors to bring out different colors from the windows.
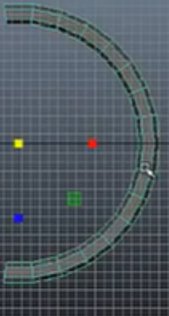
My plan after this was to make a chimney for the house, what i did was create a cylinder and edit the subdivisions of the shape such as the caps of the cylinder which was to clean the the edges away from the face so it was easier for me to extrude the faces and enlarge them as well given that the edges were not needed for what i was going to do next. However, on the other hand the vertices were required and what i did was move the selected vertices to the side which is shown at the bottom. I used the same base in which is duplicated the shape many times until the chimney was seen to be a suitable height for my house, furthermore, i created a cone to go on the top to finish of my design.

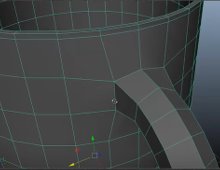
Moreover, what i did to enhance my work was add pipes to the house, the shape i used was the pipe of course in which i then selected the vertices of the bottom of the shape to pull down and enlarge the length of the pipe to make it look long in height. For a small addition i added spheres onto the pipes for protection.

Lastly, i created a fence which was in front of the houses which i then textured later on in the process after finishing all of my assets. The shape i utilized was the cube, the tool used was for extruding the shape to make it a bit slim. The object that went through the fence was another cube but extruded along and stretched. Also what you can see is that it’s all textured in varied colors to show the cartoon concept throughout this whole design process.

My TV Model–


To start making this TV model i had to spawn a cube shape, this had to happen as this was going to shape the main part of the TV which is the screen and the exterior features, to make the face, i extruded the cube inwards to create the face.
25/11/19
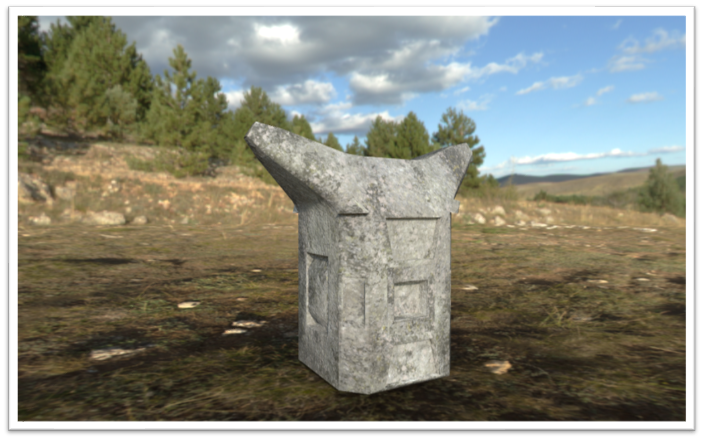
Loot Crate Designs–
Today what we had to do was plan out designs on what our loot crate may look like for future. What we did was make a moodle board which we had to do to copy and paste influential images such as loot crates or chests or crates and anything sci-fi and surreal which we could apply onto our chests to make it look more effective. What we did after was we go some paper to draw out some sketches of the chests we took from the internet which was my moodle board and i transformed my design into something original and mixed in with other influential designs from the internet.


2/12/19
3DCTM4. Understand the benefit of good workflows and efficient techniques for creating 3D models
Quad- A square or rectangular polygons is referred to as a quad or quadrilateral polygon, and is a four sided polygon. it has exactly 4 vertices at the corners by 4 edges.
Tri- A tri is referred to as a triangular poly and is a simple three sided polygon, it has exactly 3 vertices at its corners and 3 edges connecting those points.
Ngon- It is simply a face with more than 4 edges.
Ngons are claimed to be glitchy and in addition result in all sorts of mesh editing problems. They disrupt the edge flow of your model and make standard modelling operations like extrusion less effective because we cant use subdivision surfaces.
Quads are better to use as the subdivision surface algorithm works better with them.
Topology refers to the geometric surface characteristics of them mesh. in addition each surface on the mesh is a face.
Reflection–
What i have learn about Ngons is that it is not recommended to use for 3D modelers as is can be seen as messy and glitchy given that it can affect the edge flow of the model which consequently would make the tools such as extrusion less effective to utilize given that we will not be able to use subdivision surfaces. Furthermore on what i learnt was what a basic quad was and how we were able to modify it by using a different variety of tools such as extruding, inserting edge loop tool to the poly and adding subdivisions to the surface, by utilizing these features this can make the model for advanced and effective when presenting it.
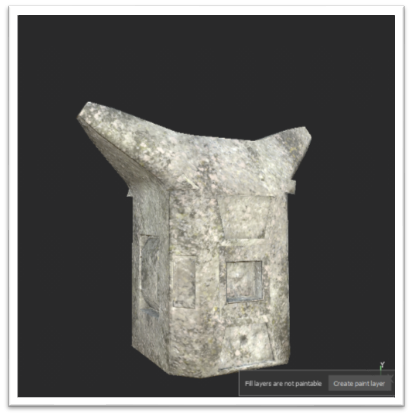
What i have made so far was my low poly model in which i was going to add as much work onto the model as i am in the high poly model as rest of the detail such as rivets and vents etc…
9/12/19
3DCTM4. Understand the benefit of good workflows and efficient techniques for creating 3D models–
The Texel Density tool enables you to quickly scale the size of the UV maps or individual polygons. The Texel Density tool allows you to specify the resolution of the texture used, which allows the Texel Density to be calculated appropriately for different texture sizes.

3DCTM5. Understand smoothing/subdivision and texture baking.-
3DCTM6. Understand the concept of high and low polygon workflow-
3DCTM7. Be able to technically and creatively problem solve in 3D–
What i have learnt about high poly modelling is that they require extra detail such as vents and rivets to make that extra improvements to the loot crate. What i have made so far was by adding extra assets onto my high poly model such as rivets and even dents which allowed me to explore further into the new type of tools such as the soft select tool which allowed me to edit the vertices for the face that i had selected. From the image below, you can see that the soft selection tool is in use and this is what it looks like when editing the bumps and dents into the chest, pressing the b button was also a shortcut for utilizing the soft selection tool but before that i had to edit the selection area of the tool to make the dents look appropriate for the size of the chest.

Above all this new tool that i was introduced to allowed me to enhance the exterior features on the chest by adding dents to make it look as if it were damaged which makes it look a more effective.
What is working really well for me is that i have improved my chest even further by adding extra features to improve my progress with the loot crate chest, what i did during the lesson was using the extruding tool and shortcuts to look more efficient, furthermore, i also used the beveling tool to smooth out any of the edges that i thought may have been too rigid and make it look professional and clean. What i would like to do in the future is further enhance my Maya skills by utilizing new tools to improve on my work rather than continuously use the same tool over and over again, given that new tools will enable me to unravel further into them and advancing.
13/01/20
In Today’s lesson my main focus was to bake my chest given that i had already finished making my high poly chest model, to start the baking process i first had to make sure that both my low poly and high poly chests were in the same position, to ensure that this was successful i made sure that the translations were all 0. If they weren’t and in this case it wasn’t, i had to freeze my values for both my models given that they both had different translation values. From this then followed on to exporting either my low poly or my high poly model first, i exported both of them as an FBX file or i could’ve exported them as a obj file either way. Furthermore, i went onto substance painter to start my baking process, so first i went on file- new and selected my low poly model first, i did this because i had to then apply the high poly model onto my low poly model, to do this i went on baked map textures to then select my file which was the high poly model, i then changed my resolution to 2160 to get a better look at my chest, and from this process the quality of my bake looked fantastic in my perspective.


My extra 3D work–
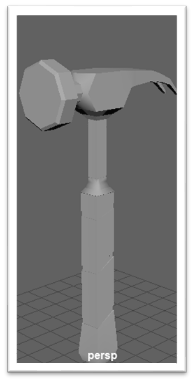
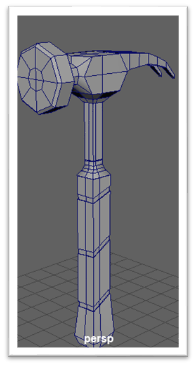
My Hammer Work–